Category Archives: Wacom

A Tablet review and new videos

Hello everyone,

Today I would like to share with you a few updates from me. 

Many artists, photographers, and designers are asking me for a recommendation on an affordable graphics tablet. The Wacom Intuos Pro is the tablet anyone would be happy to have. I’ve worked with the Wacom Intuos line for years, and they are the best tablets for graphic designers and photographers. Here is my full review. 

 Wacom Intuos Pro Orientation: from an Artist’s Perspective

Are you an Adobe Dimension user? If your answer is yes, this video is for you. In these videos I show how you can create a unique design in Adobe DImension for any occasion.

The next update is for my readers who just started their journey in Adobe Photoshop. For you, I recorded a new “How to get started with Adobe Photoshop” video. Enjoy 🙂

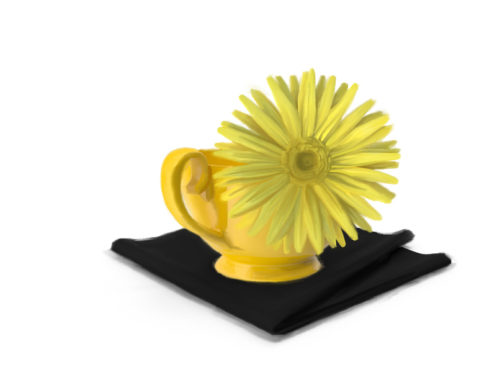
Lastly: Spring is here! I love Springtime. Everything is blooming, fresh colors, warmer weather, and a lot of new inspiration is everywhere. This spring flower is for you.

Wacom One

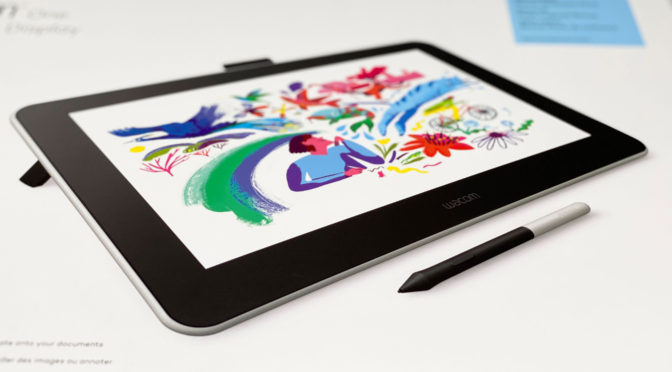
Wacom introduced the new Wacom One tablet. I have been using the Wacom One for the last few days and I really love it.

The Wacom One display size is 13,3″, and the screen resolution of 1920 x 1080 is great for any of my workflows (painting, web/graphic design, photo restoration or photo retouching).
Wacom One’s pen has 4,096 levels of pressure and a tilt angle of 60 degrees. This all makes it very enjoyable working with the Wacom One.

Wacom One is light ONLY 2,2 lbs which means you can take it everywhere you go. Personally, I will take it with me on all my business trips, I will be working with it from my chair in front of the TV, or from my kitchen or just outside when I want to work in the park.

Wacom One system requirements: Windows 7 or later, Mac OS 10.13 and later, you can connect Android device as well.

If you just started your digital journey, if you are a student this tablet is for you. The price is $399.99 and it comes with a one year warranty.

This is my full review on YouTube

Sponsored:

Wacom One on Amazon:

My Books on Amazon:

.


My Wacom Tablet Preferences

My Wacom  Cintiq Tablet Preferences.
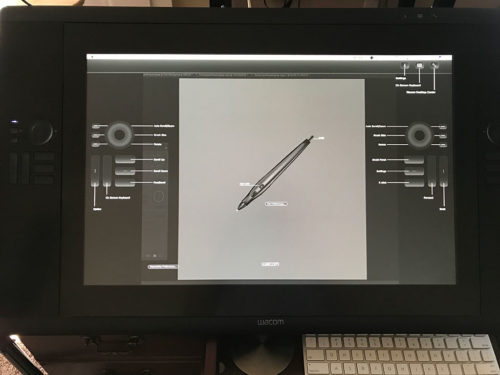
Many of you have asked me to share my Wacom tablet preferences. In this blog I will share my preferences for my main Wacom,  Cintiq 24HD.

Wacom Cintiq.

I am using a Wacom Cintiq 24HD

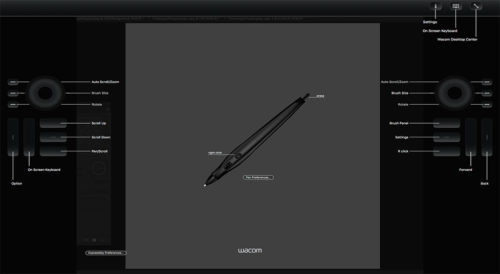
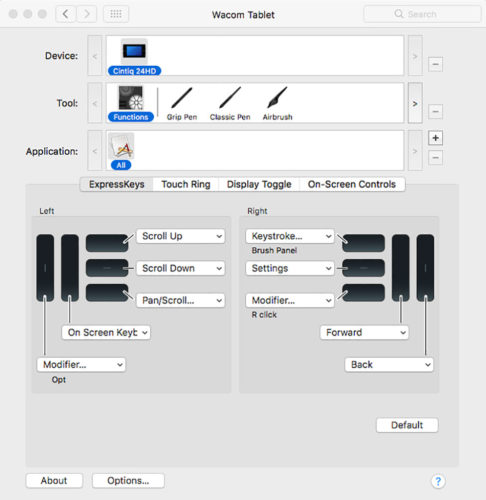
I set up my preferences for easy access to the tools I use the most. These preferences help me to be more productive and speed up my workflow.

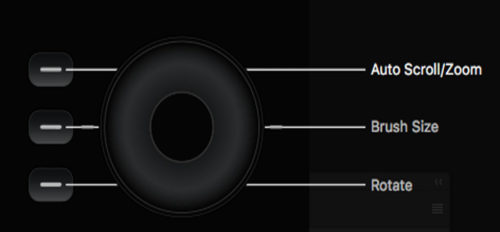
The Left Wheel:

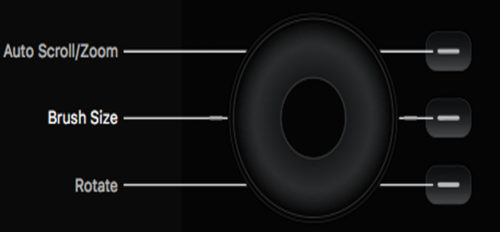
I use the left wheel to Zoom In/Out my canvas. This option is very helpful in my painting and retouching workflow. With any selected/active tool I easily can zoom in/out my canvas without changing the active tool.

The Right Wheel:

I use the right wheel  to increase/decrease the brush size. This method of brush size adjusting  just perfect to my painting and masking workflow.

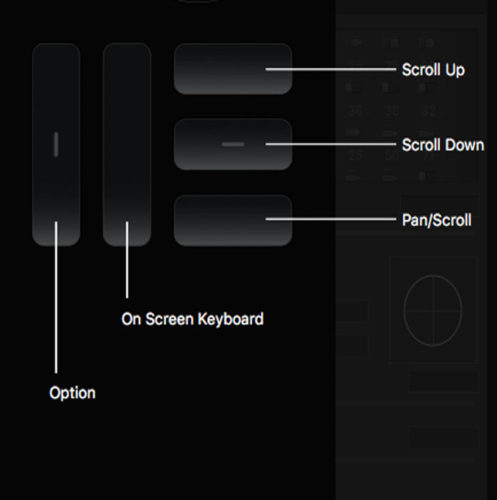
The Left ExpressKeys:

From the left to the right:
Modifier: Opt key
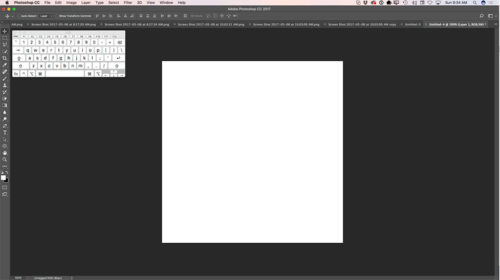
On Screen Keyboard (I use this option during my live stream or presentation to show my audience which key(s) I am currently pressing.

Scroll Up: Scroll the document up without changing the currently active tool
Scroll Down: Scroll the document down without changing currently active tool
Pan/Scroll: Scroll the document using Hand Tool without changing currently active tool (super helpful in my painting and masking workflow)

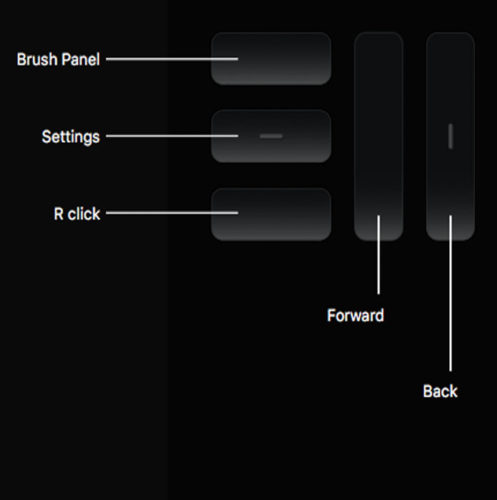
The Right ExpressKeys:

From the right to the left:

Back: Move  the active layer down without changing currently active tool
Forward: Move the active layer up without changing currently active tool
Brush Panel: Activating the brush panel
Setting: Opening the current Wacom Cintiq Settings

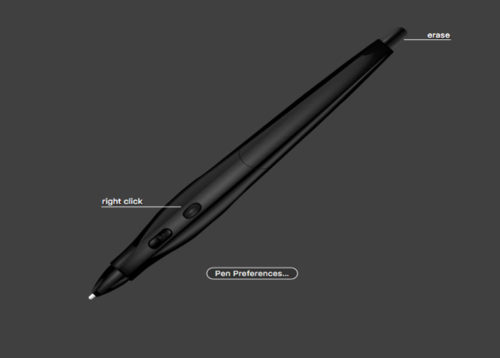
Right Click: Activating Right Click

Wacom Pen Setting:

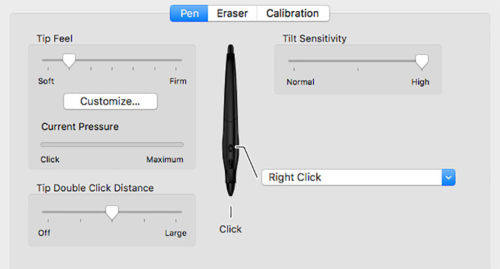
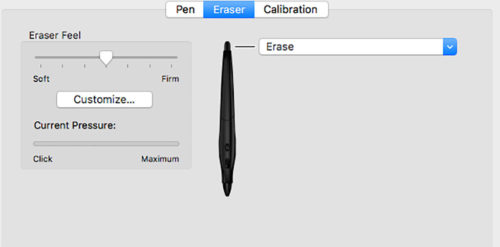
I am using a Wacom Airbrush Pen with the setting I’ve attached below:

P.S. With the Wacom Airbrush Pen workflow make sure that you have checked the “Transfer” box and switched to “Stylus Wheel” Control from Control Drop Down menus. It will help you to use in maximum power of Airbrush Pen.


My Books
My Online Training 
My YouTube 


My New Online Training Site

I’m very please to announce my NEW online training site! “Everything Digital” 

About my training site: my main goal is inspire you and make your digital workflow more enjoyable. All of my tutorials are recorded in a conversational manner. No “robotic” talking head tutorials. I want to have a conversation with YOU. I want to make the learning experience more enjoyable. Here you will find different tutorials: from beginner to advanced level. I believe that the learning experience is suppose to be enjoyable and a two-way conversation.  

In my All Digital course you will be able to access all of my courses for one monthly payment of $15.00 

My Books on Amazon:
Digital Painting for Photographers in Adobe Photoshop CC
Adobe Mobile Apps

Importance of Daily Digital Exercise

Importance of Daily Exercise


Portrait

I found that daily exercise is very important for many reasons. Daily exercise helps with exploring/developing  new techniques, polishing your skills, pushing your artistic vision into another higher level, and teaches you how to be productive and not to be stressed under the “less time” pressure.

Adobe Photoshop Daily exercise: try to have 20 minutes every day to create something new in PS. its not supposed to be too complicated or perfect. Try to composite 2 or 3 images together (and the best practice is to composite random images, not images that you thought will be good with some composition. Just choose images with absolutely different style, schemes and start working on your  Photoshop composition).
Photoshop Painting: try different styles of painting every day. Don’t spend more than 20-30 minutes and you don’t need to finish your painting if you don’t have time. Just practice with brush strokes, colors, try different brushes.

Photography: simply keep your camera next to you all the time. See something > take the shot. Different light, different angles. Try it and you will see a huge improvement just in a few days!

Mobile Apps: what could be easier?!!! You have your mobile devices with you all the time! So Adobe Photoshop Sketch, Adobe Photoshop Mix and Adobe Photoshop Fix. Try them and you will be impressed with your improvement just in a few days!

Traditional Painting: use any paper you have. Don’t try to finish your masterpiece every day. Exercise with different brush, pencil strokes, composition.

Digital Painting Made Easy with The Mixer Brush Tool in Adobe Photoshop

Victoria Pavlov Studio

My favorite and primary tool in my digital painting is the Mixer Brush Tool in Adobe Photoshop CC.

I have two styles in my digital painting:
Painting for Photographers (you don’t need to have any painting experience)
Painting from Scratch (you need to have painting experience or you need to be willing to learn how to paint 🙂  )


For the last few days I have received many questions about my favorite technique using the Mixer Brush Tool (digital painting for photographers)

My favorite technique:
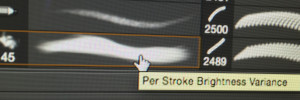
Favorite Brush: Per Stroke Brightness Variance
Preset: Custom
Load Brush after Each Stoke ( clean brush after each stroke)

brush

Screen Shot 2015-09-17 at 10.38.30 AM

Painted with Adobe Photoshop CC & wacom

Victoria Pavlov Studio


Black & White with Adobe Lightroom CC

Photoshop Tutorial

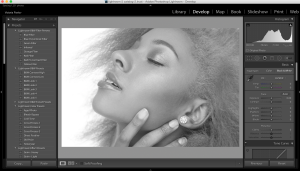
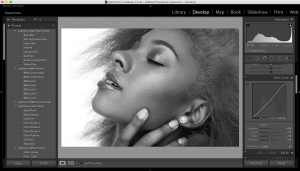
Today I will show you how to create a Black & White image in Adobe Lightroom in only 3 steps

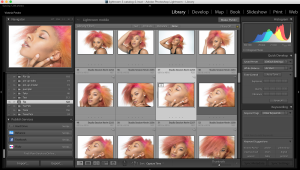
Select the image you want to work with
Screen Shot 2015-08-25 at 8.00.24 AM

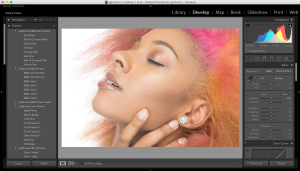
Switch to the Develop Module
Screen Shot 2015-08-25 at 8.02.36 AM

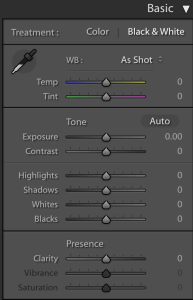
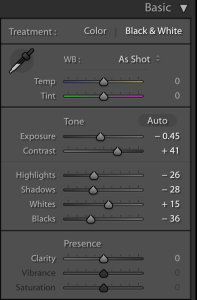
1: Choose Black & White from the Basic panel
Screen Shot 2015-08-25 at 8.03.39 AM

Screen Shot 2015-08-25 at 8.04.19 AM

Adjust the sliders to get the look you want or use mine below
Screen Shot 2015-08-25 at 8.05.35 AM Screen Shot 2015-08-25 at 8.06.31 AM


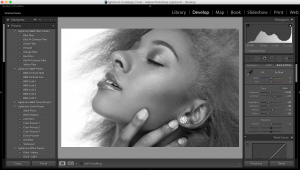
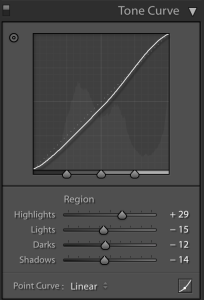
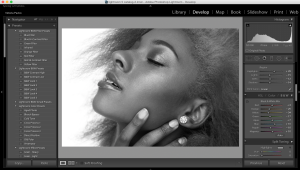
2: Using Tone Curve panel change numbers of each slider ( Highlights, Lights, Dark, Shadows )
Screen Shot 2015-08-25 at 8.07.58 AM Screen Shot 2015-08-25 at 8.08.06 AM


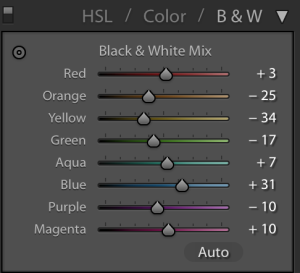
3: Change numbers of each B & W slider (it will depend of your image)

Screen Shot 2015-08-25 at 8.11.28 AM Screen Shot 2015-08-25 at 8.11.39 AM


Fotolia
 

Create Black and White image in 3 steps

Photoshop Tutorial

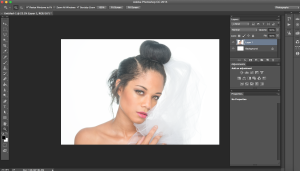
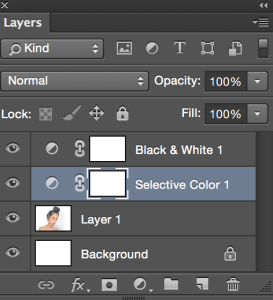
Today I will show you how to create black & white image in 3 steps using Adjustments Layers in Adobe Photoshop CC

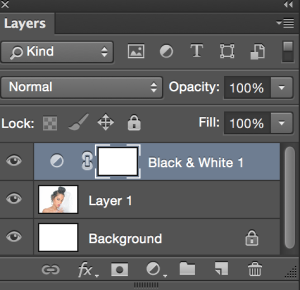
Open your image you want to work with
Screen Shot 2015-08-25 at 7.35.45 AM

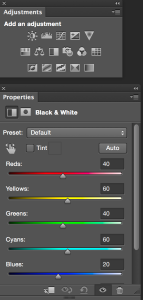
1: Adjustments > Black and White
Screen Shot 2015-08-25 at 7.36.57 AM
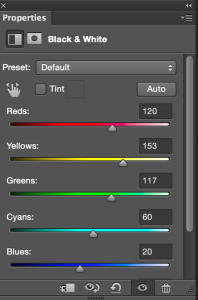
Using the black slider of each to the right/left you will  modify influence of the colors  in the resulting of black & white image.

Screen Shot 2015-08-25 at 7.41.58 AM

Screen Shot 2015-08-25 at 7.42.05 AM

Screen Shot 2015-08-25 at 7.42.16 AM

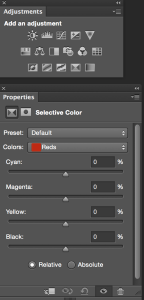
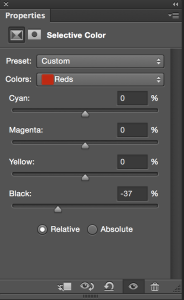
2: Highlight t your image layer ( Layer 1 )  > Adjustments > Selective Color
Screen Shot 2015-08-25 at 7.44.33 AM

Screen Shot 2015-08-25 at 7.45.16 AM

Change number of the black slider of each color ( move the slider to the left or right)

Screen Shot 2015-08-25 at 7.47.43 AM

Screen Shot 2015-08-25 at 7.49.07 AM


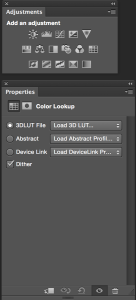
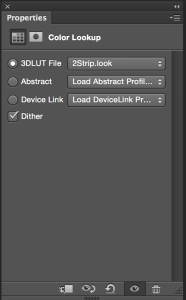
3: Adjustments > Color Lookup >2Strip.look from the 3DLUT File ( selected by default )

Screen Shot 2015-08-25 at 7.50.15 AM

Screen Shot 2015-08-25 at 7.52.16 AM

Screen Shot 2015-08-25 at 7.52.25 AM


Fotolia


5 reasons to use Adobe Stock

Painted with Adobe Photoshop CC and Wacom

I was looking for stock images for a many years and I was not impressed with what I could see on a market  until I was introduced to Adobe Stock.

I am professional photographer, digital artist, and educator. I am working and teaching  Adobe Photoshop, Adobe Muse, Adobe Dreamweaver, Adobe Premiere Pro, Adobe Lightroom, and all Adobe mobile applications and I found that Adobe Stock is the BEST source for my design, photography, painting, education workflow. Why?

Reason 1:
I’ve heard many people say: ” I am a professional photographer, designer and I am not using any stock images”. Hmmmm so if you need any professional  image, background, graphic image to build your clients “travel with us” website you will go around the world to take pictures of the places were your client offers services? And keep in mind that as usual our clients don’t know what image(s) they will use and they are depending on us to show them at least a few examples that they can choose from. So if you multiply all the costs of traveling around the world, and the time just to take pictures, your price for client’s website will rise up significantly and I am not talking about the extra time that you need to build the website. My question is: will your client wait at least 7 extra months and pay 99% more than he/ she should pay just to let you use your own images? The answer is NO and NEVER.
So reason #1: use Adobe Stock images to make your workflow more productive along with building great communication between you and your client.

Reason 2:
When you working on your client project and you’re not sure which image you or your client  will use with your design, simply download a “preview” version of the image(s) your want to use, finish your design, project, show it to your client and if your client approves your design simply click on Adobe Stock image > License image and you will visually see  that your Preview image will be replaced with high resolution, ready to use royalty free image. You don’t need to do any EXTRA steps that will increase your workflow time and your client will receive the final copy of the approved project in no time!
So reason 2: Fast and stress free workflow

Reason 3:
Quality
Adobe Stock is a worldwide library (40 million +) of the best photographers, digital artists, designers.  All images are with HIGH quality ready to use right away.

Reason 4:
The price
You have many optiosn to subscribe to Adobe Stock
1: As a Creative Cloud member you are saving 40% of the monthly plan!!!!!!
10 images a month
US $29.99 / mo
Annual plan, paid monthly

  • Add to a Creative Cloud subscription
  • Additional images at US$2.99
  • Rollover up to 120 images

2: 10 Images a month
US $49.99/mo
Monthly plan

  • Additional images at US$4.99
  • Rollover up to 120 images

3: 750 images a month

US $199.99/mo
Annual plan, paid monthly
  • Additional images at US$0.99

4: Single images are just US $9.99 without a subscription

Reason 5:
If you are a photographer, digital artist, 3D artist, graphic designer you can make money selling your work. You can sell your images, even the ones taken with your smart phone!! You can make money from your work just from your home using your computer!