Category Archives: Photography

Rule of Thirds

Rule of Thirds

Freedom


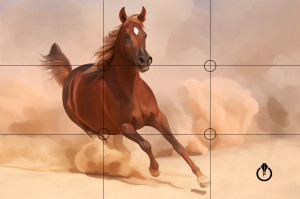
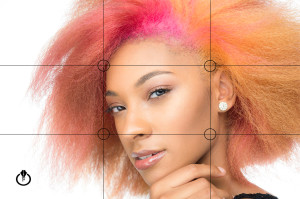
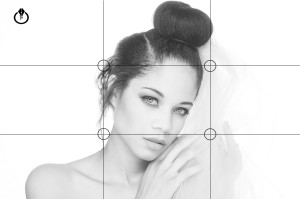
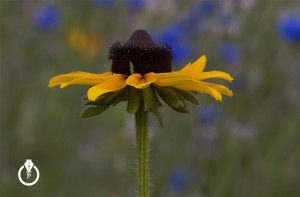
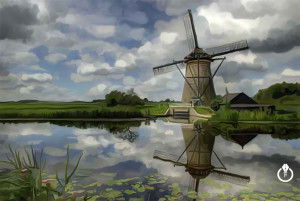
The first and most important rule that all artists and photographers should know is The Rule of Thirds. The Rule of Thirds is the key to create the right balance.

Divide your painting surface, document scene into 9 parts (two horizontal  and two vertical lines).  And now you have a grid (same as we have through our camera’s viewfinder). Now you need to decide where are your points of interest.  Try to position your points of interest  near where the lines intersect.

P.S. ONE REMINDER: REMEMBER THAT IF YOU ARE WOKING ON A PORTRAIT IMAGE …DO NOT MAKE YOUR IMAGE LIKE A MUG SHOT OR PASSPORT IMAGE. Portraits should not be perfectly aligned in a middle of your canvas/document. Make some space..make imagination flow…

Freedom

Freedom


Black & White with Adobe Lightroom CC

Photoshop Tutorial

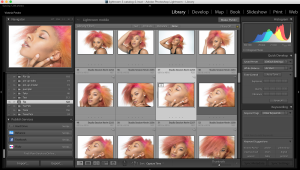
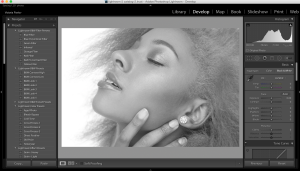
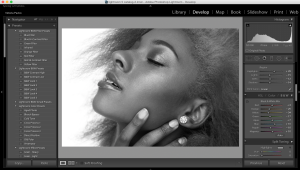
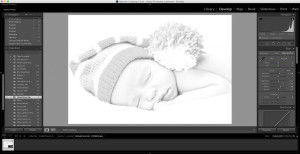
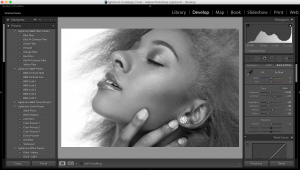
Today I will show you how to create a Black & White image in Adobe Lightroom in only 3 steps

Select the image you want to work with
Screen Shot 2015-08-25 at 8.00.24 AM

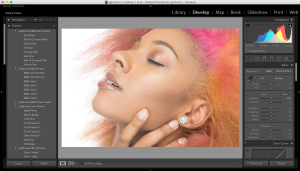
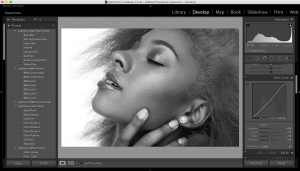
Switch to the Develop Module
Screen Shot 2015-08-25 at 8.02.36 AM

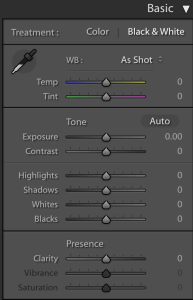
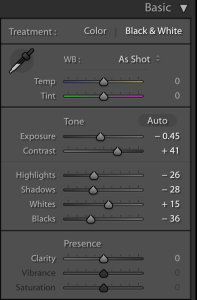
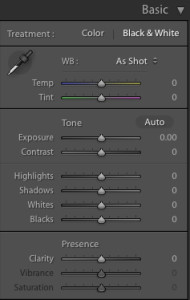
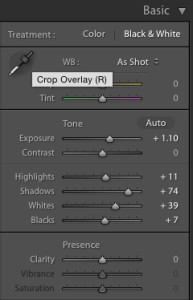
1: Choose Black & White from the Basic panel
Screen Shot 2015-08-25 at 8.03.39 AM

Screen Shot 2015-08-25 at 8.04.19 AM

Adjust the sliders to get the look you want or use mine below
Screen Shot 2015-08-25 at 8.05.35 AM Screen Shot 2015-08-25 at 8.06.31 AM


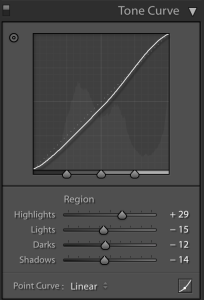
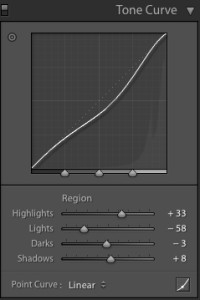
2: Using Tone Curve panel change numbers of each slider ( Highlights, Lights, Dark, Shadows )
Screen Shot 2015-08-25 at 8.07.58 AM Screen Shot 2015-08-25 at 8.08.06 AM


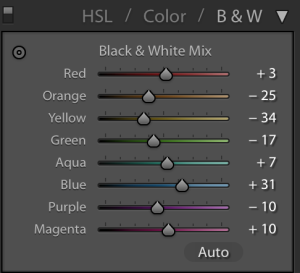
3: Change numbers of each B & W slider (it will depend of your image)

Screen Shot 2015-08-25 at 8.11.28 AM Screen Shot 2015-08-25 at 8.11.39 AM


Fotolia
 

Life is Good Series

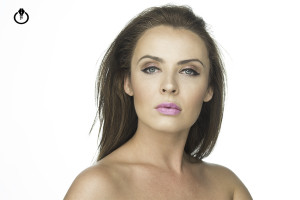
I am very excited to show you the results from  the first session of  my ” Life is Good’ series. This series is VERY important and personal to me. Life is Good is series of the cancer survivors and cancer patients  images. With my series of images  I want to show how GREAT  life is. I want to show how strong people are. I am not looking for models for my series (unless the model is a cancer survivor or cancer patient). I am looking for REAL people to show various emotions, to show that every day is gift and that we all should remember that  kindness is free. Just a few minutes of your support could save and help someone’s life. All of us could help with the cancer research, donate your time to support the people who are  fighting cancer now.

I am an artist and I truly believe  (and I know it is based on my own experience) in healing power of art. I started the series “Life is Good” using my favorite tools: Nikon camera ,Westcott lighting, Adobe Photoshop, Adobe Lightroom , Wacom, and my Mixer brush Tool. All my sessions from that series are FREE and I would truly appreciate  if any of you could spread the word to let cancer survivors  and cancer patients know about it.

And now let me introduce my first image:

Justyna Krolkiewicz:
amazing human being, model and a cancer survivor. 

Portrait Portrait Portrait

Fotolia

5 reasons to use Adobe Stock

Painted with Adobe Photoshop CC and Wacom

I was looking for stock images for a many years and I was not impressed with what I could see on a market  until I was introduced to Adobe Stock.

I am professional photographer, digital artist, and educator. I am working and teaching  Adobe Photoshop, Adobe Muse, Adobe Dreamweaver, Adobe Premiere Pro, Adobe Lightroom, and all Adobe mobile applications and I found that Adobe Stock is the BEST source for my design, photography, painting, education workflow. Why?

Reason 1:
I’ve heard many people say: ” I am a professional photographer, designer and I am not using any stock images”. Hmmmm so if you need any professional  image, background, graphic image to build your clients “travel with us” website you will go around the world to take pictures of the places were your client offers services? And keep in mind that as usual our clients don’t know what image(s) they will use and they are depending on us to show them at least a few examples that they can choose from. So if you multiply all the costs of traveling around the world, and the time just to take pictures, your price for client’s website will rise up significantly and I am not talking about the extra time that you need to build the website. My question is: will your client wait at least 7 extra months and pay 99% more than he/ she should pay just to let you use your own images? The answer is NO and NEVER.
So reason #1: use Adobe Stock images to make your workflow more productive along with building great communication between you and your client.

Reason 2:
When you working on your client project and you’re not sure which image you or your client  will use with your design, simply download a “preview” version of the image(s) your want to use, finish your design, project, show it to your client and if your client approves your design simply click on Adobe Stock image > License image and you will visually see  that your Preview image will be replaced with high resolution, ready to use royalty free image. You don’t need to do any EXTRA steps that will increase your workflow time and your client will receive the final copy of the approved project in no time!
So reason 2: Fast and stress free workflow

Reason 3:
Quality
Adobe Stock is a worldwide library (40 million +) of the best photographers, digital artists, designers.  All images are with HIGH quality ready to use right away.

Reason 4:
The price
You have many optiosn to subscribe to Adobe Stock
1: As a Creative Cloud member you are saving 40% of the monthly plan!!!!!!
10 images a month
US $29.99 / mo
Annual plan, paid monthly

  • Add to a Creative Cloud subscription
  • Additional images at US$2.99
  • Rollover up to 120 images

2: 10 Images a month
US $49.99/mo
Monthly plan

  • Additional images at US$4.99
  • Rollover up to 120 images

3: 750 images a month

US $199.99/mo
Annual plan, paid monthly
  • Additional images at US$0.99

4: Single images are just US $9.99 without a subscription

Reason 5:
If you are a photographer, digital artist, 3D artist, graphic designer you can make money selling your work. You can sell your images, even the ones taken with your smart phone!! You can make money from your work just from your home using your computer!


My favorite HDR app for mobile photography

My favorite HDR app for mobile photography is TrueHDR by Pictional LLC. I have been using this app more than year, and have no complains about any of its functionality.

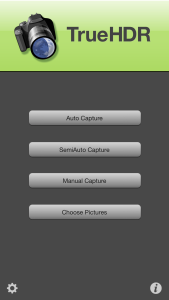
TrueHDR app has few capture modes:

  • Auto Capture
  • Semi / Auto Capture
  • Manual Capture
  • Choose Picture

IMG_3814

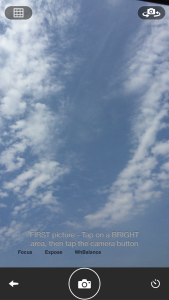
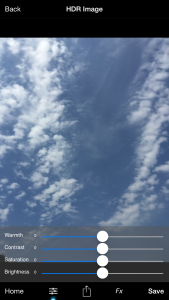
My favorite mode to use is Manual Capture. Using this mode I can manually select  Bright  and  Dark areas to merge them into HDR image. I can select between Natural ( most realistic look)  and Enhanced ( vivid colors )  modes.
IMG_3816

Using custom slider I can control

  • Warmth
  • Contrast
  • Saturation
  • Brightness

IMG_3818

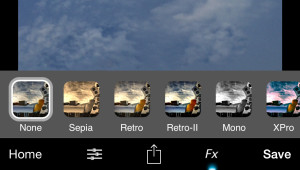
From the effect presets  I can choose any effect I want to reapply to my image ( from Sepia to Vignette)
hdr

Using many convenient sharing options you can share or print your image directly from your app.

IMG_3819c

Price: $1.99 and available fro iPhone and iPad!

IMG_8181  IMG_7612

IMG_7785


For iPhone:

For iPad:

Fotolia

Drawing effect with Adobe Photoshop

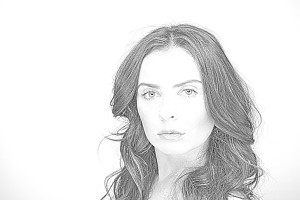
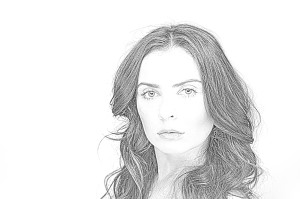
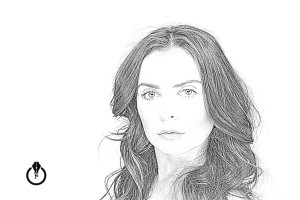
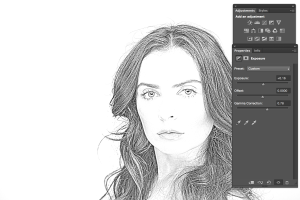
How to convert your photo into a drawing  using  Adobe Photoshop CC.

Open your image you want to work with

Tutorial


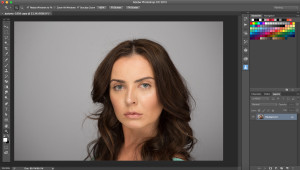
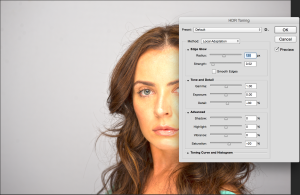
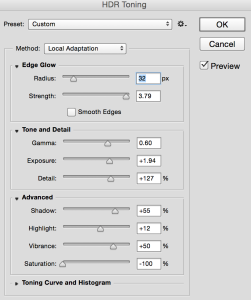
1: Image > Adjustments > HDR Toning

Screen Shot 2015-07-23 at 5.38.29 PM

Screen Shot 2015-07-23 at 5.42.14 PM

Tutorial


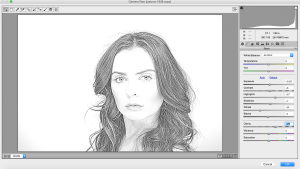
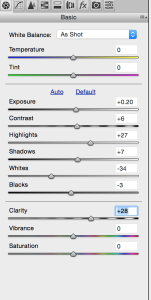
2: Filter > Camera Raw Filter

Screen Shot 2015-07-23 at 5.45.32 PM

Screen Shot 2015-07-23 at 5.45.40 PM

Screen Shot 2015-07-23 at 5.46.20 PM

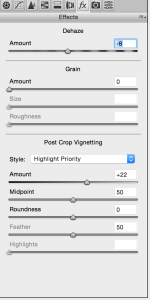
! Move Dehaze slider to the left. Moving Dehaze slider to  the left or to the  right you will control how light or dark your pencil stoke is

7


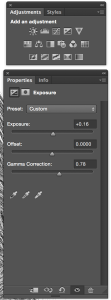
3: Window > Adjustments > Exposure

Screen Shot 2015-07-23 at 5.58.01 PM


Screen Shot 2015-07-23 at 5.58.21 PM

Drawing Effect Tutorial


Fotolia
 

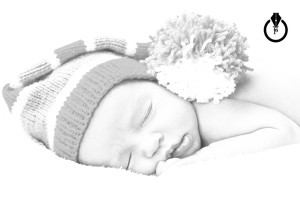
Convert your photo into a drawing

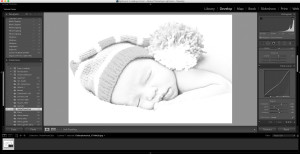
Step by step tutorial how to convert your photo into a drawing using  Adobe Lightroom  CC:

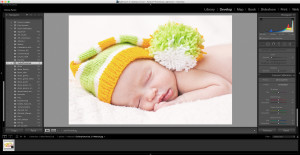
1: Open your image in the Develop module  ( I am using Adobe Stock   image #57908828

Screen Shot 2015-07-09 at 12.31.15 PM

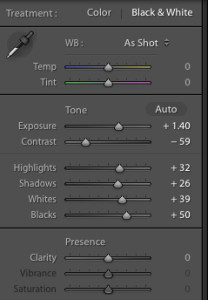
2: Click on the Black & White Tab

Screen Shot 2015-07-09 at 12.34.07 PM

3: Apply the following setting

Screen Shot 2015-07-09 at 12.36.02 PM

Screen Shot 2015-07-09 at 12.36.39 PM

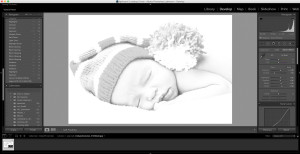
4: Using Tone Curve apply following setting

Screen Shot 2015-07-09 at 12.38.30 PM

Screen Shot 2015-07-09 at 12.39.29 PM

5: Apply the following Black & White Setting

Screen Shot 2015-07-09 at 12.42.07 PM

Screen Shot 2015-07-09 at 12.42.17 PM

Adobe Lightroom Tutorial

My Adobe Photoshop & Adobe Illustrator Seminar

How to create a simple Valentine’s Day card in Adobe Illustrator

How to get started with still-life painting in Adobe Photoshop


Fotolia


SanDisk 32GB Class 4 SDHC Memory Card, Frustration-Free Packaging- SDSDB-032G-AFFP (Label May Change)

SanDisk Ultra 32GB UHS-I/Class 10 Micro SDHC Memory Card Up to 48MB/s With Adapter- SDSDQUAN-032G-G4A [Newest Version]

Samsung 64GB EVO Class 10 Micro SDXC up to 48MB/s with Adapter (MB-MP64DA/AM)


Download Adobe Lightroom