How to Create a Halloween Image using Adobe Photoshop CC
My Social Networking sites.
Hello everyone,
Just wanted to invite all of you to follow me on my Social Networking Sites for art, graphic design, website creation, mobile/desktop design applications tutorials, inspiration and just to have a conversation.
Twitter: @Victoria_Pavlov
Facebook: Victoria Pavlov
Behance: Victoria_Pavlov
Twitch: Victoriapavlov
Periscope: Victoria_Pavlov
YouTube: Victoria Pavlov

Adobe Photoshop Sketch is a GREAT app for your all mobile digital painting needs. You can start your painting project from anywhere at any time. You don’t need to wait and put your inspiration on hold inspiration until you will get back to you desktop or laptop. With Adobe Photoshop Sketch you can start and finish an entire project using only your iPad. You can also start your project anywhere and finish your project at home/office using the desktop version of Adobe Photoshop CC.

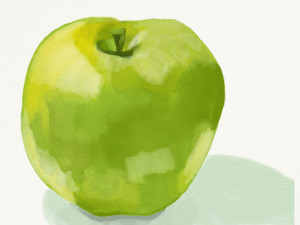
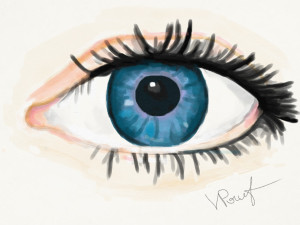
I am happy to see the new watercolor paint brushes with the new Adobe Sketch 2.0 update. Using watercolor brushes allows you to blend your colors to create realistic painting based on watercolor paint techniques. Typical in “traditional” painting, we are using watercolor paint over white paper. Watercolor paint based on water and because of that we can have a “color spreading ” effect when your watercolor paint is spreading over the white paper. In “traditional” painting we are using dry brushes, sponges or any other tool to dry out watercolor quickly to stop mixing the colors and spreading it over your paper. This option is in Adobe Photoshop Sketch: we have a FAN. Using the fan you can stop mixing and spreading the color at ANY TIME. Just make the brush strokes with two colors, release your hand and click on fan icon right away!
You can send your Photoshop Sketch file to Adobe Illustrator CC or Adobe Photoshop CC. The best way to get feedback about your work is upload it on Behance.
I BELIEVE AND KNOW that with the new watercolor brushes in Adobe Photoshop Sketch we have officially erased the border between “traditional” and digital painting. No such a thing as a “traditional” or digital painting: all is art with the same strokes, techniques, and art soul.
How to create water drop effect in Adobe Photoshop CC
How we can created water drop effect only in 5 minutes using Adobe Photoshop CC
My Help To Go service
My Help To Go service offers help with any of your design and photography projects. If you want a second opinion, or you’re just not sure if you are in a rough patch I can help you. This is a one-on-one online consultation. You can choose between half hour and one hour consultation.
I support follow applications:
“Life is Good” is series of the cancer survivors and cancer patients images. With my series of images I want to show how GREAT life is. I want to show how strong people are.
“Life is Good” will be a variety of positive and beautiful art that seeks to represent those same qualities among the strong people who have survived, or are battling to survive cancer.
I desire is to raise cancer awareness in a positive, creative and loving manner by leasing space for a gallery to sell prints of my works.
All proceeds of each sale, after cost, will be contributed to charities. My GoFundMe goal amount will go toward the cost of leasing space and printing enough works to fill it.
With this project, I wish to show how GREAT life is and how strong people can be. I hope you will join me in this effort. The appreciation certainly would not end with me.
My favorite and primary tool in my digital painting is the Mixer Brush Tool in Adobe Photoshop CC.
I have two styles in my digital painting:
Painting for Photographers (you don’t need to have any painting experience)
Painting from Scratch (you need to have painting experience or you need to be willing to learn how to paint 🙂 )
For the last few days I have received many questions about my favorite technique using the Mixer Brush Tool (digital painting for photographers)
My favorite technique:
Favorite Brush: Per Stroke Brightness Variance
Preset: Custom
Load Brush after Each Stoke ( clean brush after each stroke)
Last week I had the pleasure of photographing Vicky Ryder (for my Life is Good series) who had celebrated her 10th year of being free of cancer. I met Vicky about 15 months ago and I must say that she is one of the most beautiful human beings inside and out. I asked Vicky to share her story with us. And this is what she said:
The day after these photos were taken marked exactly 10 years since a lung biopsy revealed a malignant carcinoid tumor in my right center lung lobe. Two weeks later, I had the entire lobe surgically removed.
I am a strong believer in positive thinking and fighting through hard times. In spite of severe pain, and a ton of post-operative equipment I won’t even start to describe, I was taking laps around the hospital floor in record time. I wanted out of there.
Fortunately, my coding job allowed me to work remotely. I was back to work as soon as I could sit up, even though I had short term disability left over.
As heroic as that all seemed to people at the time, it was not without its struggles.
Having never experienced any major medical issues prior to that year, I felt like “damaged goods” for quite awhile. With a surgical wound spanning from just under the right breast all the way to my back, I had only two positions I could comfortably assume. My ribs had been sawed through, so I couldn’t get out of bed without tears from the pain. I couldn’t breathe without discomfort. I needed help to get through even the most embarrassing daily tasks. I certainly couldn’t drive for a long time. Up until this point, I had been an exceptionally independent woman. Needless to say, I suffered bouts of depression.
Little is known about the cause of carcinoid tumors. All the doctors could tell me is that it probably was not caused by any of the usual suspects, or more people would have them. Carcinoid tumors are relatively rare. For awhile, I was paranoid of everything from candles to traffic fumes.
Though I was back to a somewhat normal routine after a few months, it was around a year before I felt normal. By that, I mean I had assimilated enough that a day went by where I wasn’t reminded of all the ways life had changed.
Throughout that year, I resolved to only let it change me for the better. I remembered that worrying about the unknown was no way to live life, and I started to truly appreciate what I had vs. lament what I didn’t. I had loved ones to help me through it all. I had a supportive job. Apart from annual CT scans, I needed no followup treatment. Most importantly, I was lucky to have caught it early.
At five years out, I was officially considered a cancer survivor.
Fast forward 10 years. The two remaining right lung lobes expanded to fill in for the missing third. I can breathe better and do more than I could for several years prior. Most importantly, I’m alive. I’ve taken life head-on by changing careers in an attempt to be sure I spend my remaining time on Earth doing things I love.
This isn’t to say the last 10 years have been perfect. Believe it or not, I’ve been through even more trying times with my health. Life, in general, has surely had its ups and downs. I have just learned to take it all in and build a new kind of strength upon it. I do my best to share that strength with others in every way possible.
I typically only speak of my experiences with cancer to those who are in need of the same moral support I was so lucky to enjoy. When I realized I would be in Victoria’s neighborhood precisely 10 years to the day of my cancer diagnosis, I knew it was time to do a bit better than that. I hope all who read this will see that, above all
Life Is Good.
A big influence and inspiration for me as a digital artist is music. I LOVE music and I always inspired by it. As I am always saying ” music is the strings of an artist soul”. I can’t listen to the same melody/song over and over, day by day (yes, I have my music library with music I can listen to over and over, year by year) but I need a “new” song every day. I love classical, pop and many other styles and until Apple introduced Apple Music I would struggle with my music library (Can you imagine having to buy new music ever day? Yes, impossible). And now I am very happy: I can have just about ANY song by ANY artist at any time, I can follow my favorite artists, I can add songs to my playlist(s), share song/album, and make them available offline, buy my favorite song/album, and I have my favorite radio stations. After some period of time Apple is learning what I love and suggesting music for me (based on the song/album I added to my Favorites). All are available on any of my devices: iPhone, iMac, MacBook Pro, Apple Watch, or iPad. And the best part: any membership plan is MUCH cheaper than the one or two albums I used to buy an every month (and first 3 months of your membership is free). And I did not mention about teenagers. ALL teenagers are music fans and they need more and more and more music every day! For families with more than one child sometimes it is very problematic to give them all music they want. Now with the Apple Music Family Plan you can do it! For any one who really loves music, Apple Music is the best and the right place for all your needs. Apple Music is Good for me and it’s GREAT with the Family Plan.
One of my favorite business apps is Scanner Pro by Readdle . With Scanner Pro I can scan any document, paper, receipts, or just an image and save or share it using my mobile device. A great app for just $2.99!!!!
When you first login to your app the welcome screen will ask you to join. Simply enter your email address and now you are ready to turn your mobile device to portable scanner.

I am always using the manual scanning option for accurate edge adjustments after scanning.
Take a Picture of your paper, document, images you want to scan (also you can scan from your Camera Roll )
And now you can manually adjust edges of your scan to fix the persepective
Now you have MANY options to share your scanned document
Also you have MANY different choices to upload your document to cloud services like Dropbox, Google Drive, OneDrive and more!
With Scanner Pro it doesn’t matter where I am. I don’t need to be at my office to scan a document. My mobile device is my pocket scanner now!