Tag Archives: art

Art Community

Hello, everyone!

This blog post is a bit different from my usual ones. As this year comes to an end, I’ve been reflecting on the many conversations I’ve had with so many of you. With that in mind, I’ve decided to make a few changes to how I approach social media.

While I truly enjoy social media, I value meaningful interactions over fleeting engagements. My goal is to connect with people who genuinely want to engage in conversations—not just because my posts happen to pop up in their feeds during a quick scroll.

I want to build a community rooted in our shared passions for art, photography, design, and the exciting possibilities of AI. After thinking long and hard about where to focus, I’ve chosen Instagram as the platform to bring us together.

If you’re not already following me on Instagram, now’s the perfect time! Follow me, send me a message there, and as a thank-you, I’ll share a free download of holiday-themed Adobe Fresco sketches and some of my custom adjustments for Photoshop.
But that’s not all—each month, I’ll be offering exclusive free downloads for my Instagram followers. Together, we can create a unique and inspiring art community where creativity thrives.

Let’s connect, collaborate, and build something extraordinary on Instagram!

P.S. If you missed my announcement, I’ve moved all my technology-related conversations, including tutorials, to my dedicated tech blog. Be sure to check it out for in-depth content and updates!

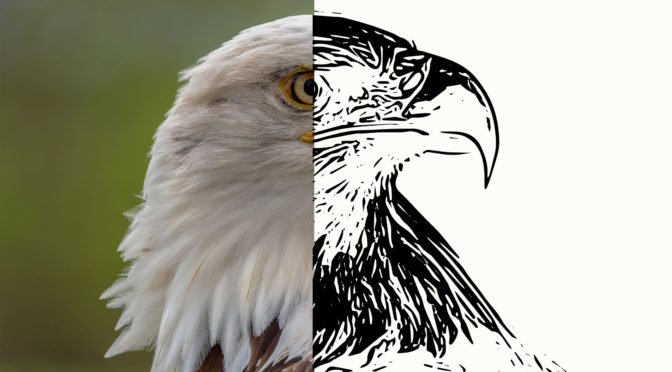
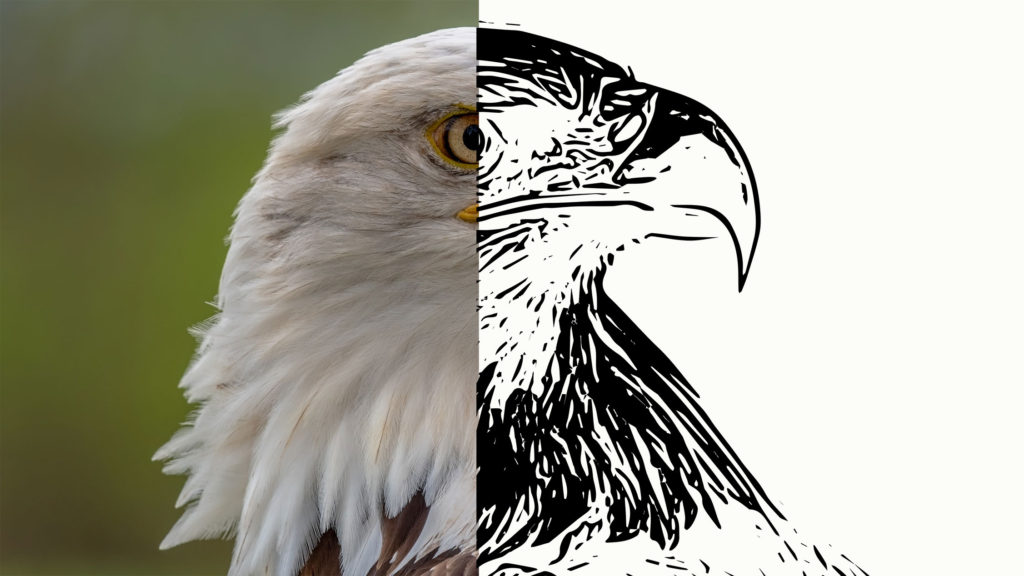
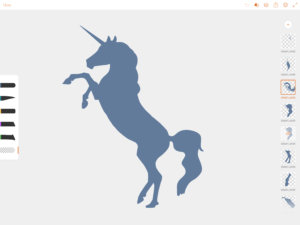
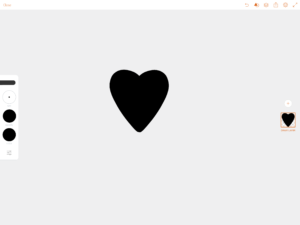
Convert photographs into a sketch with one click

Creating custom art based on photographs has never has been easier than now. Today I will show to. you how to convert a photo into a sketch with one click.

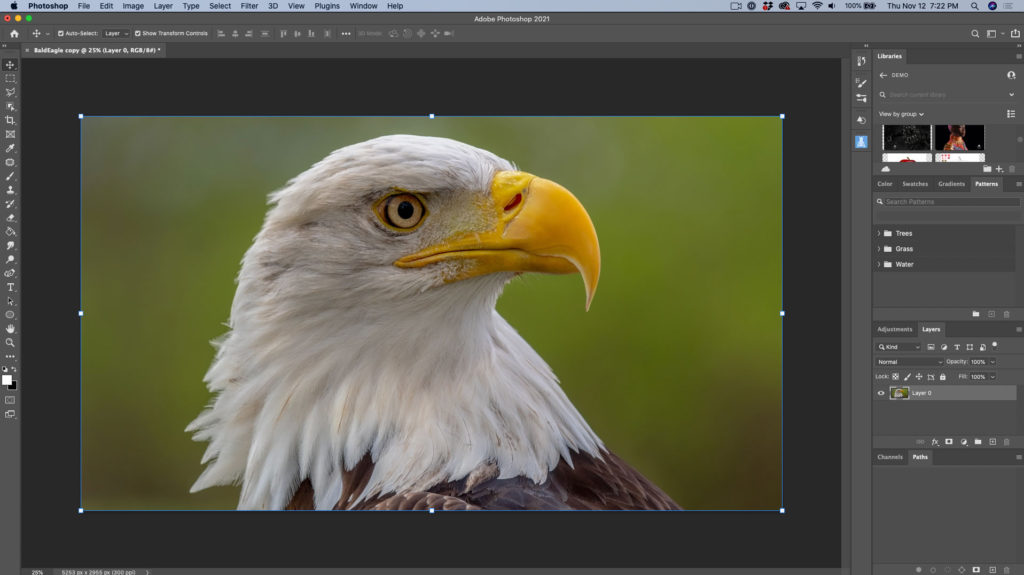
Open the image you want to work with

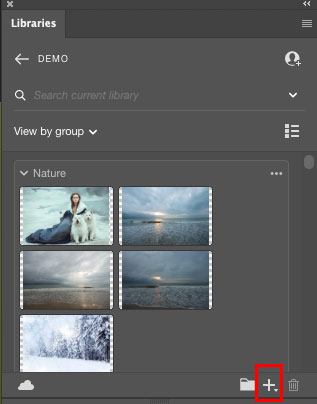
With your image open, open your Creative Cloud Library panel. At the bottom of the CC library, click on “+” icon

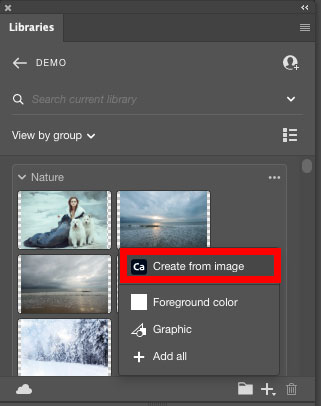
Click on Create from image

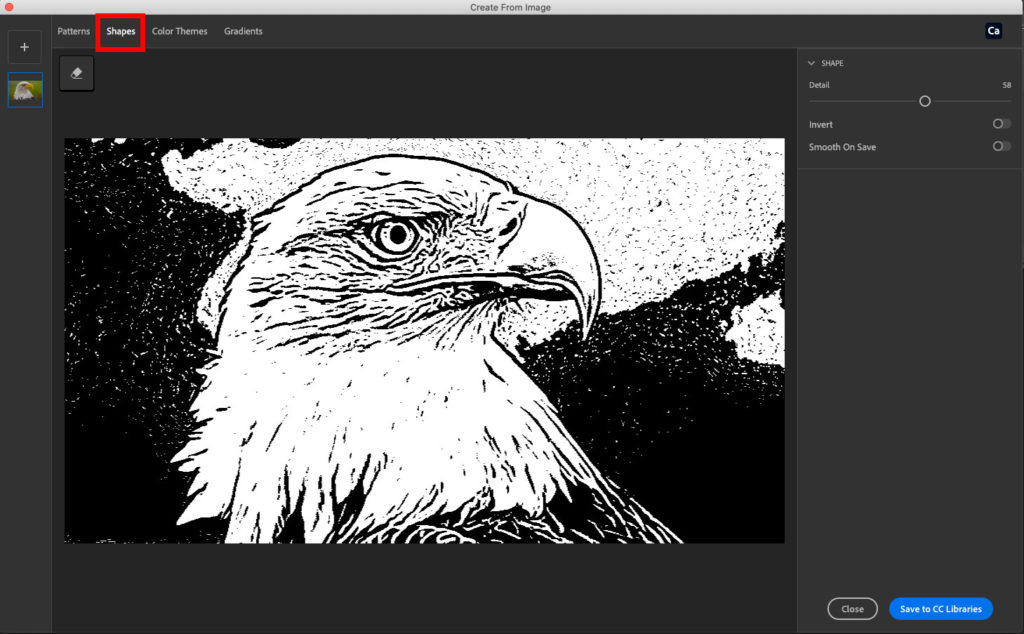
Photoshop will redirect you to the Adobe Capture workspace

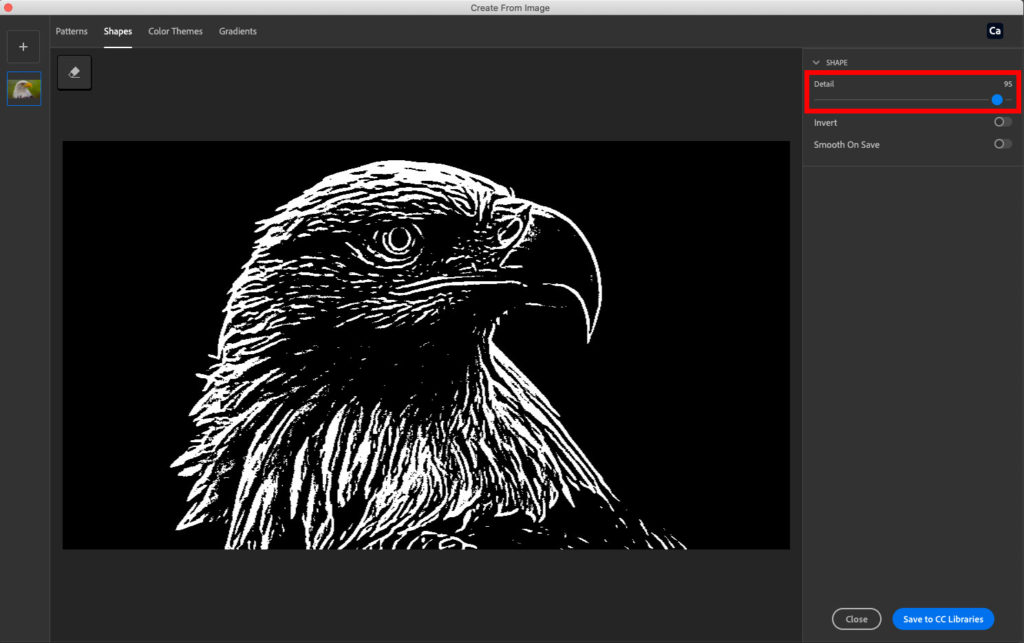
Every image is different. You need to make your own decision on how many details you would like to see in your shape. You can specify a detail value between 1- 100%. In this image I made a decision to specify detail value at 95%

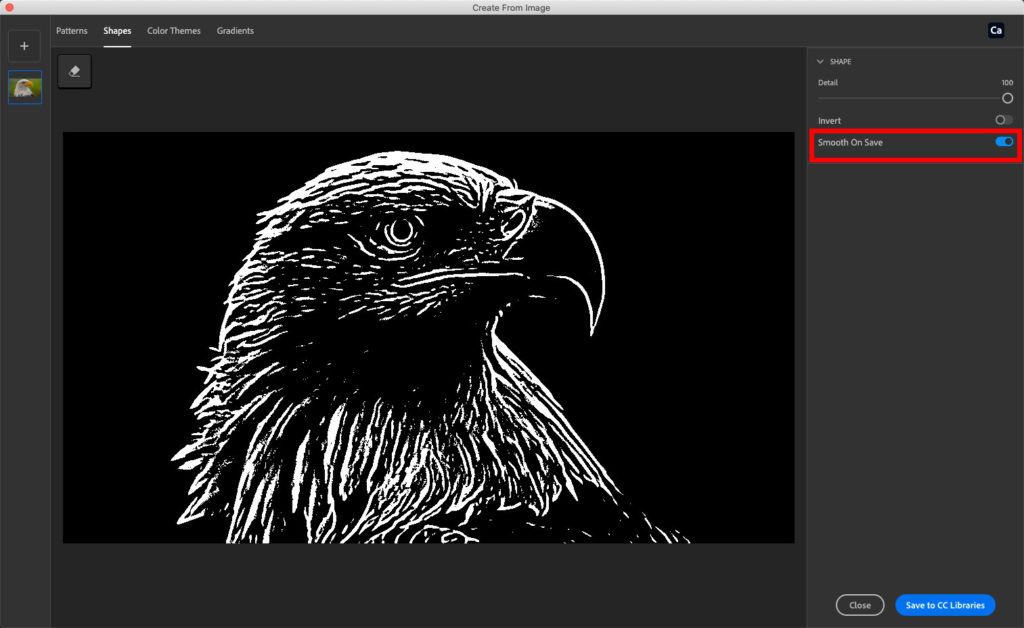
Now I have converted the image into a sketch with only one click. The Smooth on Save feature will help to smooth all lines in a shape (it’s absolutely optional).

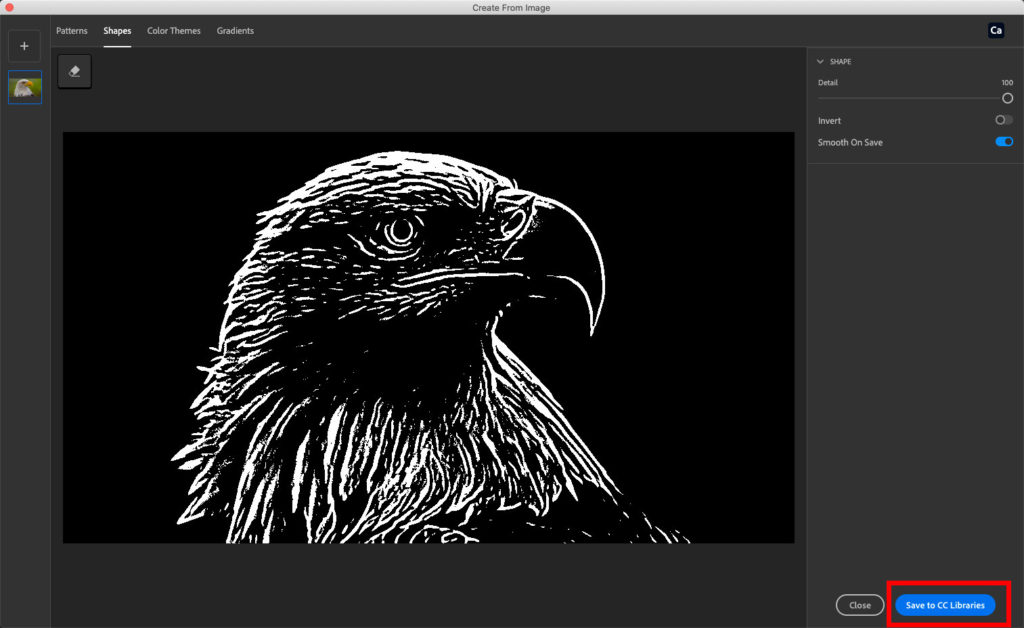
After you are happy with your shape click on Save to CC Library and Photoshop will save the new shape to the active (opened) CC library.

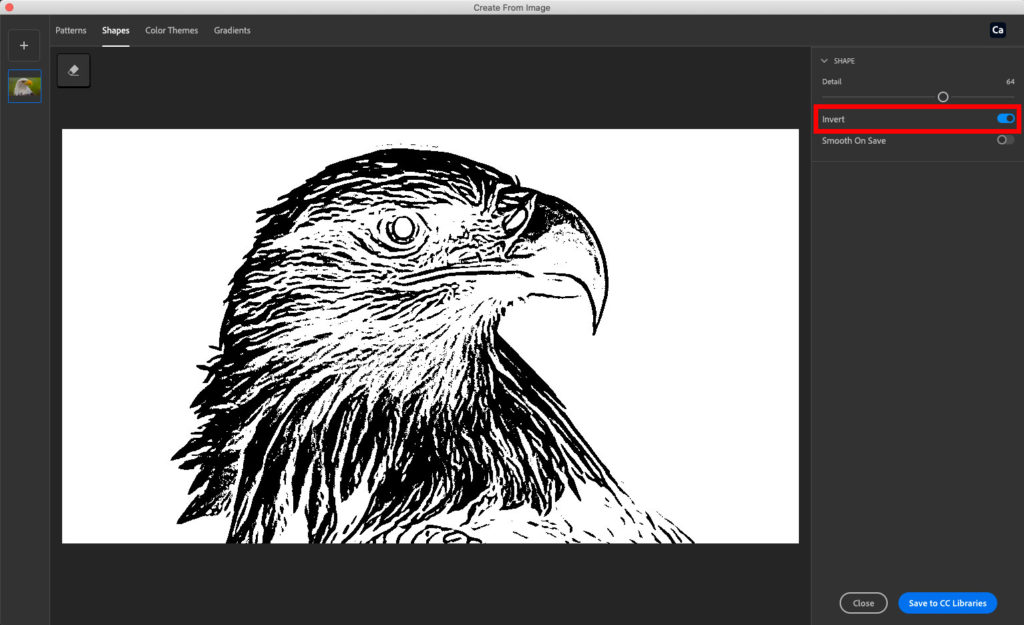
If you would prefer to have a white background, click on Invert and adjust details as needed. I am using this option when I want to have a transparent background instead of black.


As an Amazon Associate, I earn from qualifying purchases listed below

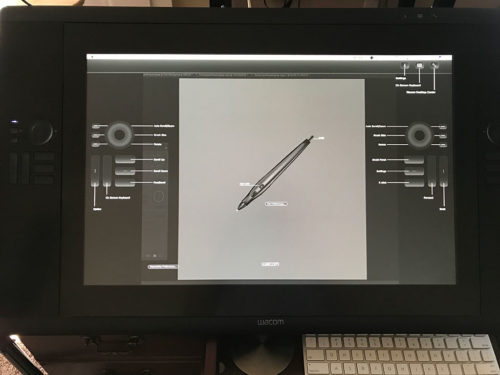
My Wacom Tablet Preferences

My Wacom  Cintiq Tablet Preferences.
Many of you have asked me to share my Wacom tablet preferences. In this blog I will share my preferences for my main Wacom,  Cintiq 24HD.

Wacom Cintiq.

I am using a Wacom Cintiq 24HD

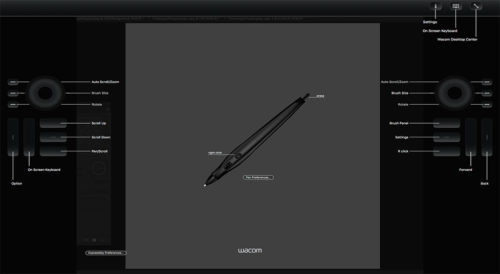
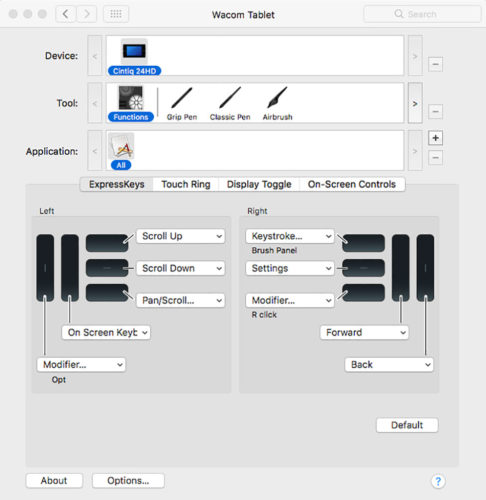
I set up my preferences for easy access to the tools I use the most. These preferences help me to be more productive and speed up my workflow.

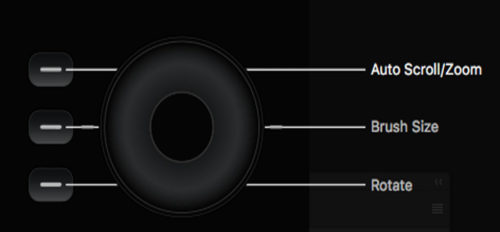
The Left Wheel:

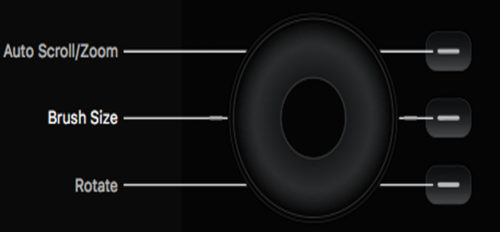
I use the left wheel to Zoom In/Out my canvas. This option is very helpful in my painting and retouching workflow. With any selected/active tool I easily can zoom in/out my canvas without changing the active tool.

The Right Wheel:

I use the right wheel  to increase/decrease the brush size. This method of brush size adjusting  just perfect to my painting and masking workflow.

The Left ExpressKeys:

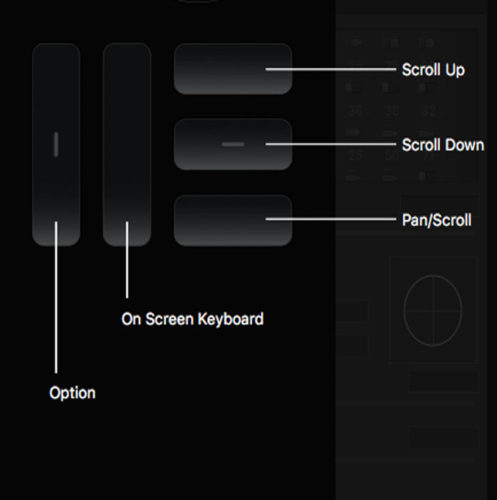
From the left to the right:
Modifier: Opt key
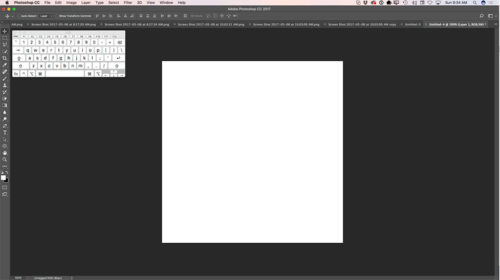
On Screen Keyboard (I use this option during my live stream or presentation to show my audience which key(s) I am currently pressing.

Scroll Up: Scroll the document up without changing the currently active tool
Scroll Down: Scroll the document down without changing currently active tool
Pan/Scroll: Scroll the document using Hand Tool without changing currently active tool (super helpful in my painting and masking workflow)

The Right ExpressKeys:

From the right to the left:

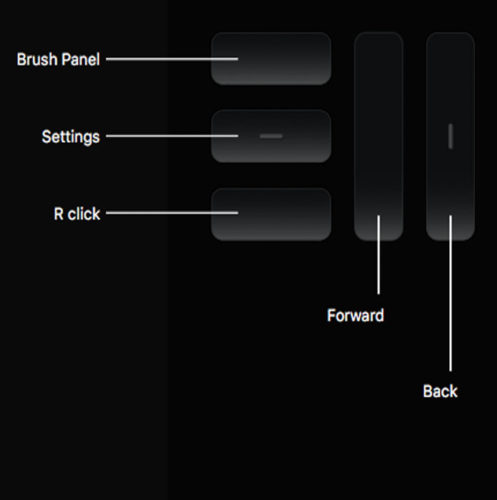
Back: Move  the active layer down without changing currently active tool
Forward: Move the active layer up without changing currently active tool
Brush Panel: Activating the brush panel
Setting: Opening the current Wacom Cintiq Settings

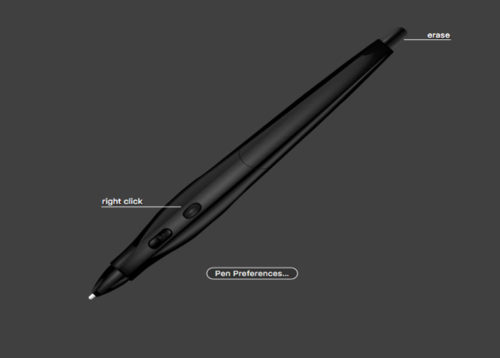
Right Click: Activating Right Click

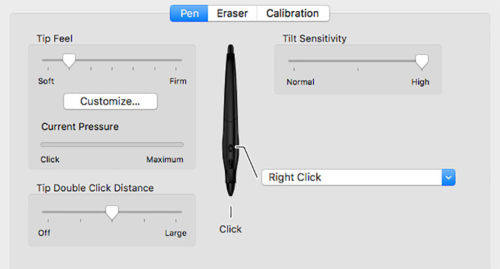
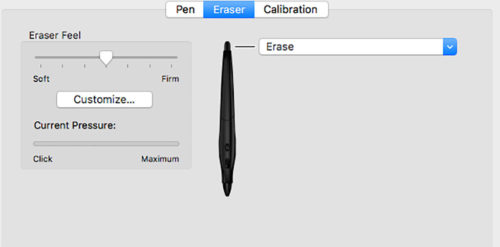
Wacom Pen Setting:

I am using a Wacom Airbrush Pen with the setting I’ve attached below:

P.S. With the Wacom Airbrush Pen workflow make sure that you have checked the “Transfer” box and switched to “Stylus Wheel” Control from Control Drop Down menus. It will help you to use in maximum power of Airbrush Pen.


My Books
My Online Training 
My YouTube 


Importance of Daily Digital Exercise

Importance of Daily Exercise


Portrait

I found that daily exercise is very important for many reasons. Daily exercise helps with exploring/developing  new techniques, polishing your skills, pushing your artistic vision into another higher level, and teaches you how to be productive and not to be stressed under the “less time” pressure.

Adobe Photoshop Daily exercise: try to have 20 minutes every day to create something new in PS. its not supposed to be too complicated or perfect. Try to composite 2 or 3 images together (and the best practice is to composite random images, not images that you thought will be good with some composition. Just choose images with absolutely different style, schemes and start working on your  Photoshop composition).
Photoshop Painting: try different styles of painting every day. Don’t spend more than 20-30 minutes and you don’t need to finish your painting if you don’t have time. Just practice with brush strokes, colors, try different brushes.

Photography: simply keep your camera next to you all the time. See something > take the shot. Different light, different angles. Try it and you will see a huge improvement just in a few days!
Mobile Apps: what could be easier?!!! You have your mobile devices with you all the time! So Adobe Photoshop Sketch, Adobe Photoshop Mix and Adobe Photoshop Fix. Try them and you will be impressed with your improvement just in a few days!

Traditional Painting: use any paper you have. Don’t try to finish your masterpiece every day. Exercise with different brush, pencil strokes, composition.
Rule of Thirds

Rule of Thirds

Freedom


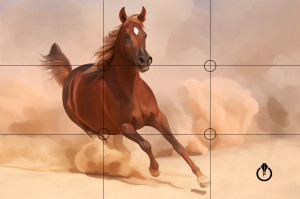
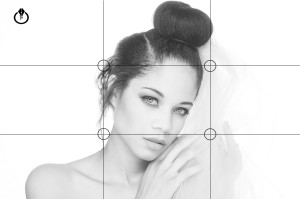
The first and most important rule that all artists and photographers should know is The Rule of Thirds. The Rule of Thirds is the key to create the right balance.

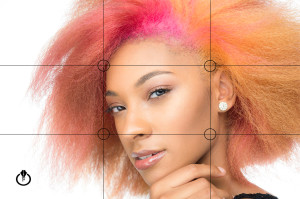
Divide your painting surface, document scene into 9 parts (two horizontal  and two vertical lines).  And now you have a grid (same as we have through our camera’s viewfinder). Now you need to decide where are your points of interest.  Try to position your points of interest  near where the lines intersect.

P.S. ONE REMINDER: REMEMBER THAT IF YOU ARE WOKING ON A PORTRAIT IMAGE …DO NOT MAKE YOUR IMAGE LIKE A MUG SHOT OR PASSPORT IMAGE. Portraits should not be perfectly aligned in a middle of your canvas/document. Make some space..make imagination flow…

Freedom

Freedom